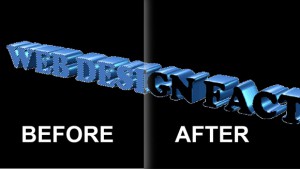
 In this Photoshop tutorial I’ll show you how to create a stunning 3D text effect in only 12 steps. As well, you will learn to use various drawing techniques, channels, and patterns. So let’s get started to this Photoshop tutorial!
Before you start, you may also like to read our previous Photoshop tutorial:
- Tough Metal Text with Photoshop
- Retro Comic Book Effect
- Simple and Elegant Text Effect
- Retro Analog Effect to Your Photos
Photoshop Tutorial for Creating Stunning 3D Text Effects
Step 1
First, create a large black canvas (1600px x 1200px). Now you will need something written in 3D effect. Below are two possible variations.

If you prefer a bit of Mac spice, use the command “Extrude and Bevel” in illustrator. This tutorial from PSDUTS may help you through it. Other way is more toward a Windows flavor, Xara3D is another.

Step 2
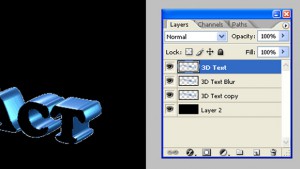
Place the 3D text and rename it as “3D Text”. Then, with the Magic Wand Tool select the face of the letters and cut that part as you can see from the screenshots below.
Step 3
Now a fun part starts. Make two copies of this layer, one for backup (“3D Text Copy”) and another one (“3D Text Blur”). Set the backup copy aside to cool for a bit (aka, Hide). Leave the other two layers on the fire and easily accessible. Turn down the heat a bit on 3D Text Blur; let it simmer for a while and come back to it later.
Step 4
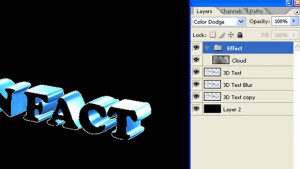
At this step, create a new layer group, rename it “Effects”, and change the blending option of this group to “Color Dodge”. Now, being careful not to disturb the other layers, reach inside this new layer group and, with a flick of the wrist, create a new layer, applying the filter “Clouds” (Filter > Render > Clouds) to give it that nice, bulbous steadiness.
Step 5
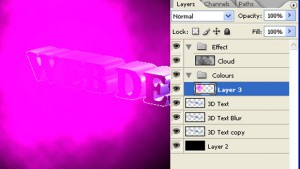
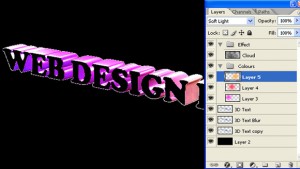
Dropping just below that group in your palette, create another group, this one named “Colors”. Now, we are going to give it a go again. As before, within this new group you will need to create a new layer; add a sprinkle of pink, and with the gradient tool (in Radial Mode) draw a soft edge glow. After that, set the layer blending mode to the Low mixer setting, or “Soft Light”. At this point, you might see a strange pink cloud.
Step 6
Repeat the previous step with two other bright colors, but placed differently.
Step 7
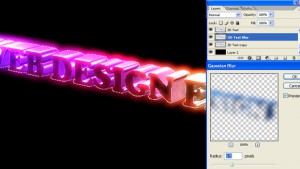
Select “3D Text Blur” now and apply a Gaussian Blur of 13 pixel radius (Filter > Blur > Gaussian Blur)
Step 8
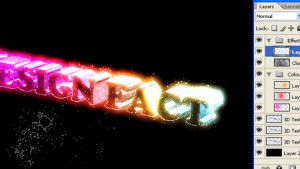
At this step add a new layer in the “Effects” group, immediately above the “Clouds”. Download a cool brush from DeviantArt and apply white to trace around the inside face of each the letters.
Step 9
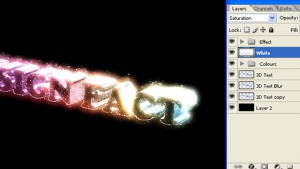
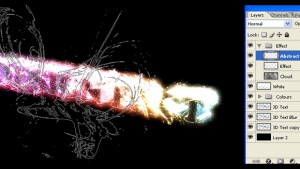
Now carefully slide another new layer between the two groups (Effects and Cloud). Reach for Gradient Tool (this time in Linear Mode), choose White and, holding down the Shift key, drag the Gradient tool from the outside edges of the canvas to the middle of the image. And set blending mode to “Saturation”. Now create a new layer in the Effects group and name it “Abstract Lights”.
Step 10
Then ctrl-click (command-click for you Mac users) the “3D Text” layer icon in the layer’s palette and paint inside the new selection with a custom abstract brush (use WHITE).
Step 11
We are almost done. The icing on all of these layers. Create one layer above the “White” layer we just did. Use a nice LARGE custom brush, like this, and draw a single Cloud above the text. Apply a Motion Blur (Filter > Blur > Motion Blur) with an Angle of -11 as well a distance of 200 pixels.
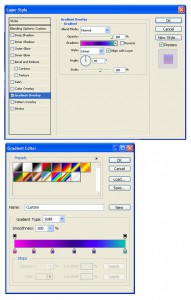
Change the Opacity to “30%” and apply a gradient overlay with the following settings:
Final Step
Here we’ve easily spice up any old 3D text into something awesome.

As well you can create some twist using various Photoshop brushes as follows Enjoy!

Download PSD file – 3D Text Effects in Photoshop

Hey, It’s is a very nice Photoshop tutorial. Thanks for sharing !!
Wow, so helpful, thanks a lot, with the help of this tutorial we easily understand and create 3D effects.