 Since our previous tutorial of creating a magical lightning effect drive lots of traffic to us, here we’ve come with another Photoshop Tutorial for our readers. Keeping in mind the million possibilities of Photoshop, today, we would like to take you to procedure of creating beautiful lighting FX effect on scatters by using Adobe Photoshop. But do keep in mind these are the basic guidelines for creating this effect, there is no end point to your creativity with Photoshop.
Before you start, you may also like to read our previous Photoshop tutorials:
- Fake Model Photography in Photoshop
- Tough Metal Text with Photoshop
- Simple and Elegant Text Effect
- Cool Retro Analog Effect
Beautiful Lighting FX Effect in Photoshop
Step 1
Create a new document file in Photoshop and changed the current layer to “Background” layer and fill it with black color. Now, create a new layer, then you should select some brush you like, here I have chosen vector brush. (This vector brush is available in psd source file at the bottom of this Photoshop tutorial.)

Step 2
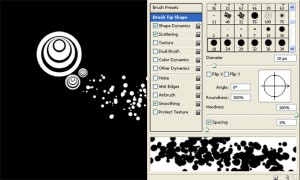
Again create a new layer via Layer > New > Layer. Select the Brush tool and open the Brushes Panel (Window > Brushes). Now we will play around with its setting to achieve the set best effect. The reason of doing this is to create a set of randomized dots. Use the setting below:
– Brush Tip Shape: (Hardness: 100%, Roundness: 100%, Spacing: 1%)
– Shape Dynamics: (Size Jitter: 100%, Minimum Diameter: 20%)
– Scatter: (Both Axes, Scatter: 1000%)
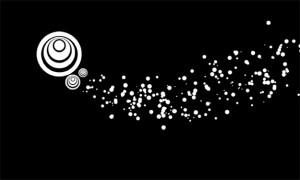
Step 3
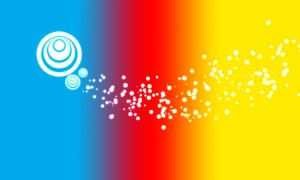
Now, create another new layer above the background layer. Then choose a soft brush, then fill like the picture below with any color you like.
Step 4
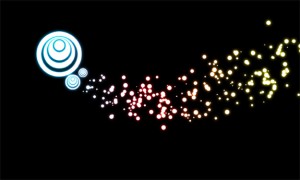
Now, select the first layer, then go to the menu Select->Load Selection. Then choose New Selection and press OK.
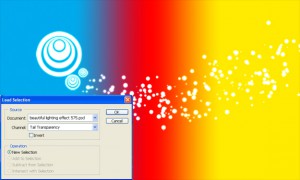
Into the next step, repeat the above step, but choose “Add to Selection” in the “Load Selection” dialog box instead. Now, you have loaded the selection. With the “Color Base” layer active, you click on the “Add layer mask” button at the bottom of the layer panel. Then you will have the result like the demonstration below.
Step 5
Into this step, we’re going to add glow effect to Head layer. For that go to Layer > Layer Style > Outer Glow. You could play around with those settings such as size, spread, opacity… however remember to set Blend Mode to Overlay and the color to White.
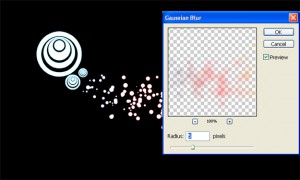
At the end of this step, right click on the “Color Base” then choose “Apply Layer Mask”. Then, go to Filter > Blur > Gaussian Blur. You should set the Radius between 4 to 6. In this case, Here I have given the value of 5.
Step 6
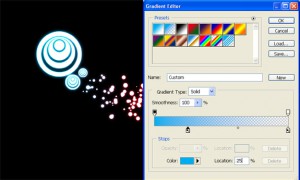
Create a new layer above the “Color Base” layer. Then, choose the Gradient tool and use the Foreground to Transparent preset. Go into the Gradient Editor and click the foreground color slider and change its position to 25%. Exit the editor, pick a color that pleases you (can be changed later) and make a Radial Gradient over the “Head” layer. You could move the layer to match up with the “Head” layer.
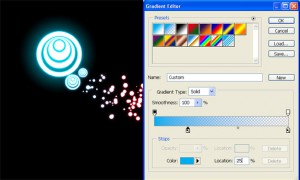
Now with that layer still active, go to Layer > Layer Style > Color Overlay. Change the color to White and blend mode to Overlay. For this case, I have added some more colorful effect in this step, and I changed some setting by press Ctrl + U to open Hue/Saturation dialog and give it the settings like below.
Step 7
Now, duplicate the “Head” layer and pick the smudge tool, then select a soft brush at around 50% strength. This step is not easy to do. Must be patient to smudge the new copied layer along the picture; try to use another tool such as “Eraser” to have the best result.
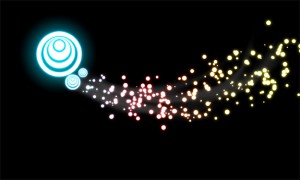
Then, duplicate the current layer. Right click on it, choose Blending Options, and set the “Blend mode” to “Dissolve”. You should notice the opacity during this step to adjust the appearances of the scatters around the main object. Again, the “Eraser” tool needs to be used reasonably to get rid of scatters.
Final Step
At this step, you should adjust the settings to achieve final result like below. As I have said before, you should keep open your creativity in this Photoshop tutorial. You should play around with opacity, fill settings, combine with eraser, and smudge tools to finalize the art work.

I have included two sets of vector brushes with psd file.
Download PSD file – Beautiful Lighting FX Effect

Fantástico tutorial!! Parabéns!