 Few weeks ago, I had posted a tutorial showing how to create magical lighting effect in Photoshop. I have seen “buy me a mug” feature on many blogs/websites. Why not add some extra in it. Today it’s the time to show you the process of creating amazing Photoshop Light effect.
- How to Create a Simple and Elegant Text Effect
- Create an Explosive Flaming Poker Card in Photoshop
- How to Give a Cool Retro Analog Effect to Your Photos
Create Amazing Photoshop Light Effect in 7 Easy Steps
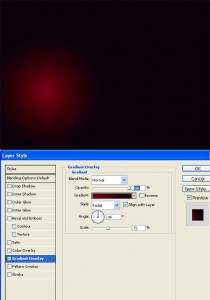
Step 1
Create a new document and apply a Layer Style on the background layer. Add a Gradient Overlay and a Pattern Overlay to it.
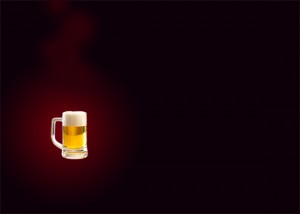
Step 2
Add a beer mug icon that you want.
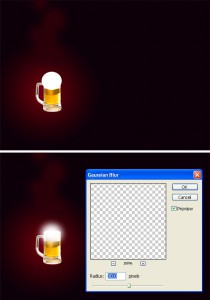
Step 3
Select the Ellipse Tool (U) and make a shape. After that apply a Gaussian Blur (Filter>Blur>Gaussian Blur) with radius of 30px.
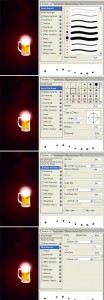
Step 4
Create a new Folder name it “Light Effects”. Modify its blend mode to Color Dodge, and move the ellipse you created to this folder. To create a sparks we will use the amazing brush engine. Add a new layer, inside the “Light Effects” layer, set white for the color and follow the images below.
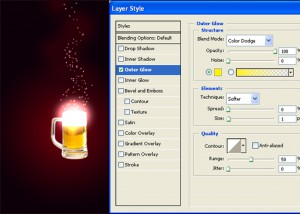
Step 5
Using the Layer Styles add a Outer Glow to the sparks.
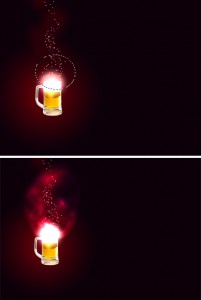
Step 6
Then add some smoke. Create a new Layer, name it “Smoke”. Change its blend mode to Color Dodge and select the Lasso Tool. Set 40px for Feather and create a selection. After that make sure that the foreground is white and the background is black and apply a Filter>Render>Clouds.
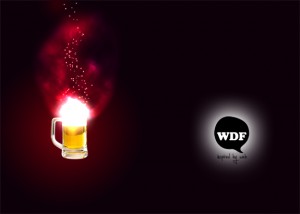
Final Step
Place your logo and enjoy your creation.
Download PSD file – Amazing Photoshop Light Effect