 Into this post, we will teach you to create your own custom poker card from scratch by using the wide variety of shapes that come with Adobe Photoshop. You will also learn the technique to manupulate fire by using simple methods.
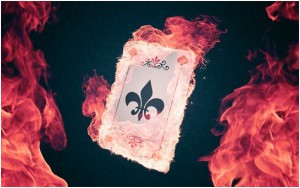
Step 1
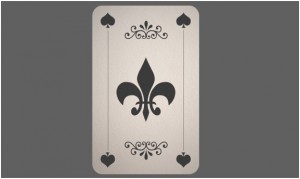
Open up Photoshop and create a new document of 1680×1050 and click OK. As a start, you will need to fill the background with a grey color #606060 so that all details of the flames will be visible once we are going to edit them.
Step 2

Create a new layer and name it Poker_card_base. We are going to create the poker card base by using the Rounded Rectangle Tool (U). We need a Shape Layer as it needs to be fully editable when we are going to edit the card shape itself. Set the Radius, located at the top menu, at 40px and drag the regular card shape.
Step 3
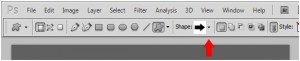
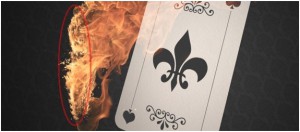
Time for some creative freedom! You are going to create your own poker card with custom Shapes. With the Custom Shape Tool (U)selected, you will notice that there is a small arrow located to the right of the default Shape. Click on that and it will open the Custom Shapes Picker menu, try to find the spades shape.
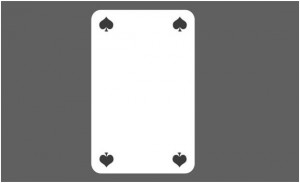
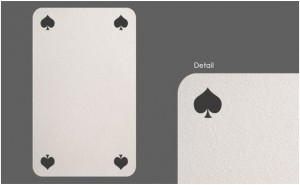
You will automatically create a new Shape Layer when you drag the tool from the upper left corner. Make the spades symbol as large as you want but use a dark grey colour (#3b3b3b).
I want the symbol to show on each corner so we will need to duplicate this Shape by selecting it with the Path Selection tool (A)and pressCtrl+C and Ctrl+V and drag it to the right corner. Select and copy the two spade shapes again en drag them towards the bottom of the card and flip them by pressing Ctrl+T and rotate these layers 180 degrees. You should have this result at this point of the tutorial.
Step 4
Download this Paper Texture by Suzanne Clute and open it up in Photoshop and drag it into our working canvas. Place the texture below the Spades_symbols layer. Press Ctrl+T and make the texture smaller so that it fits the card, make sure you overlap the texture by a few pixels.
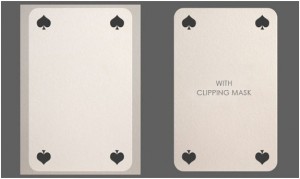
Note: I have lowered the opacity of the texture on the left for better viewing. In the Layer Menu, right-click on the texture layer and select Create Clipping Mask.
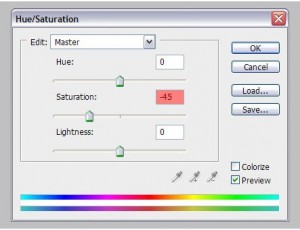
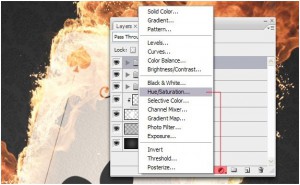
As you can see the texture will be wrapped around the poker card base. The texture has a soft pink tone which I want to get rid of by using a Hue/Saturation Adjustment Layer which you can create by clicking on the Create New Fill/Adjustments Layer icon located on the bottom of the Layer Menu. Set the Saturation to -45 to saturate the color a little bit.
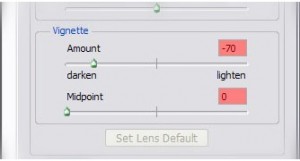
The card looks better but could still use some improvements. Go to Filter>Lens Correction or press Shift+Ctrl+R to create some vignetting. Click on the Custom tab on located at the top right and go to the Vignette section and set the Amount to -70 and the Midpoint to 0.
Step 5
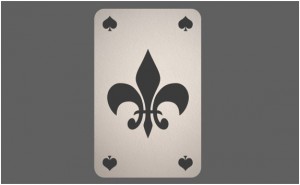
Photoshop comes with a set of custom shapes we can use for this tutorial. Find the Fleur-de-Lis shape (shown below), create a new Shape Layer and with the dark grey colour #3b3b3b
Step 6
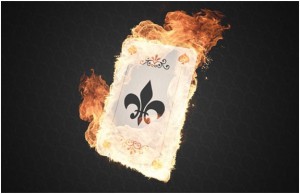
You can go as crazy as you want with your own custom poker card with the wide variety of shapes. At this point of the tutorial I have added a few ornaments to break away from the generic poker card image but still keep it simple. As you may have noticed, I have also reduced the size of the Fleur-de-Lis.
Step 7
There is a huge collection of free floral patterns on the web which we are going to use for the background. Download this Floral Pattern byJan Hadenfeldt and open the Photoshop file. Remove the Layout folder created by the author and rasterizing the Smart layer so that it is easier to edit.
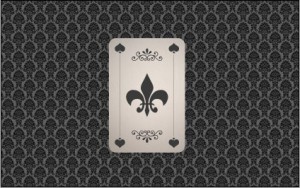
Select the pattern layer and drag it into our poker card composition beneath the poker card layers. We have to create several duplicates so that the entire background is filled with the pattern (in total I have created about 23 copies). Merge all the copied pattern layers.
Rotate the pattern layer about 45 degrees in any way you would like and lower the Opacity to 15%.
Step 8
Fill the grey background with a darker grey (#454545) and apply the vegetating trick again by going to Filter>Lens Correction or Shift+Ctrl+R but only this time, set the Amount to -100 and the Midpoint to 0. This will darken the edges but gives a nice spotlight for our card.
Step 9
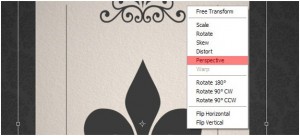
Then change the perspective of the card so that it will give the impression that the card is 3D, not quite like Avatar but we can at least try. Select all of the layers that are connected to the card such as the shapes and texture. Press Ctrl+T and right-click on the selection, this will open up a small menu with various options, choose Perspective.
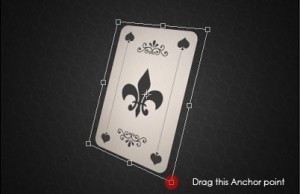
Drag the lower right Anchor Point towards the bottom to change the perspective into something more 3D and something visually exciting. Just try to keep it realistic.
Once you are done finding a perspective you like, hit Enter. Please note that I also rotated the card and reduced the size just a little bit.
Step 10
Download and open the Fire image in Photoshop but don’t drag it into our composition just yet. In the photograph there are three seperate flames which we will need to cut out so that they all have their own layer. Simply use the Polygonal Lasso tool (L), create a selection around a flame and you can cut the flame through Layer via Cut. Do this with all three flames.
Step 11

Drag the middle flame into our composition and drag it on top of all the layers. Set the Layer Mode to Screen so that the black background will dissappear, this is a nice trick as you can do this with most natural elements (fire, water, earth). As you can see, the fire image layer is too big for the card so simply resize it by pressing Ctrl+T, the image will be selected and ready for resizing. Drag one of the Anchor Pointsto do so. Notice how every flame has a curve section that goes into an almost straight line, this is perfect because we are going to align it with the sharp edges of the poker card.
Step 12
Press Ctrl+T to rotate the flame and align it with the poker card like so:
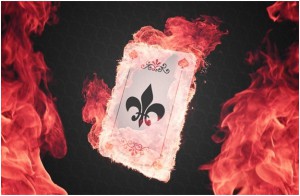
Repeat steps 11 and 12 to create a poker card that is engulved in flames by using Layer Masks and the other flames until you have something like this:
Once you are done, create a new group and drag all the flame layers in there.
Step 13
This is starting to look good but to intensify the flames simply copy the flames group and you will notice that the flames are much brighter and this is exactly what we want!
Step 14
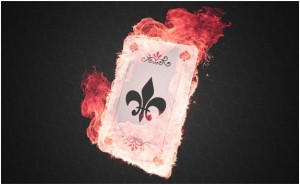
I am kind of tired of seeing the generic flame colours we always see so let’s go ahead and give it another tint by using a Hue/Saturation Adjustment layer and set the Hue to -24..
Step 15
Create a copy of the Paper Texture and set the Layer Mode to Darker Color and set the Opacity to 50%. Use the Burn tool (O) to darken some of the spots on the paper texture to accentuate the flames a little better.
Step 16
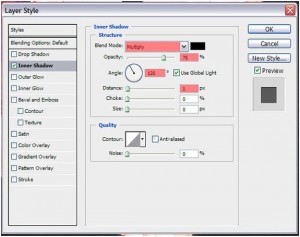
I personally think all the card shapes look a bit flat so I am going to add a Layer Style to help show them more. Double-click on the right side of the Fleur-de-Lis shape and check the box for Inner Shadow. Set the Blending Mode to Multiply, the Opacity at 75%, the Angle at 120 degrees and set the Distance to 1px.
If done properly, you should end up with this effect:

Repeat this step for all shapes or simply copy the Layer Style and paste them onto the remaining shapes.
Step 17
For the giant flames on both sides, you will need to open the original Fire image again and drag two or three flames into the composition. Do not resize them until you are happy with the placement. You can rotate or flip them, whatever you want.
Step 18
You can easily change that by adding a Color Balance Adjustment Layer with the settings shown below.
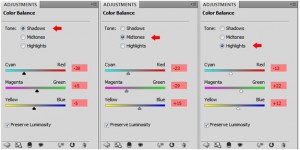
Set the Layer Mode to Darker Color. Explosive flaming poker card is created in Photoshop.
