 In this Adobe Photoshop tutorial, you will learn how to create awesome linear light halftone dot effect in less than 2 minutes. Hope you find this Photoshop tutorial useful for your design projects.
 Step 1
Open the image you want to give the linear light and halftone dot effect in Adobe Photoshop.

Step 2
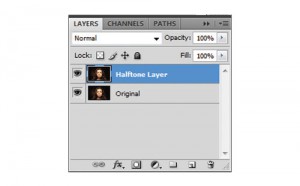
Duplicate the image to a second layer and give label to layers as “Original” and “Halftone Layer”. Move the “Halftone Layer” to the top of the layers window and select that layer.
Step 3
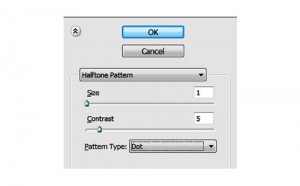
Be sure that foreground color is white and your background color is black. With the “Halftone Layer” selected then select Filter > Sketch > Halftone Pattern from the menu bar. Use the setting in the image below or play around some. Click “OK” when you are done.
Your image will look like following image.

Step 4
Now invert the halftone. On a PC hold down your Control Button and press I.
On an iMac use the Command key and press I.

Step 5
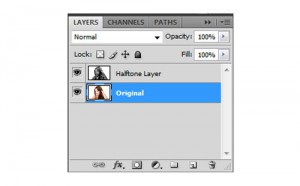
Select the layer and change its mode from “Normal” to “Linear Light”. You can also decrease the transparency if you like.
Final Step
And we’re done. We have given an awesome linear light halftone dot effect in less than 2 minutes using Photoshop.

Download PSD file – Halftone Dots and Linear Light
So Cool Effect, i will try it <3 , thank you <3