 Often many web developers are in search of implementing a multi-level navigation bar for a website or blog. They can find some but they are not following semantic and clean approach of coding. Developer should use simple and standard methods. In this tutorial we have illustrated that how you can implement a perfect multi-level navigation bar using CSS, HTML and a simple jQuery to hide and show sub-menus.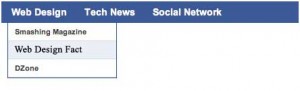
You can easily use again the code in this tutorial for your projects by customizing the CSS and changing links.
Navigation Bar Structure
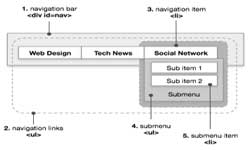
Standard box model of a classic navigation bar is given below:
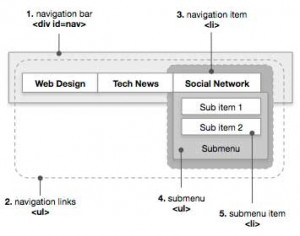
And here is the HTML structure to implement it:
</ul>
</li>
<ul>
Following is the code used into tutorial. This is nested unordered list.
<li><a href=“#”>Web Design</a>
<ul class=”submenu”>
<li><a href=”http://www.webdesignfact.com”>Web Design Fact</a></li>
<li><a href=”http://www.dzone.com”>DZone</a></li>
</ul>
</li>
<li><a href=“#”>Tech News</a>
<ul class=”submenu”>
<li><a href=”http://www.mashable.com”>Mashable</a></li>
<li><a href=”http://www.cnet.com”>CNET</a></li>
</ul>
</li>
<ul>
<div>
Simply add new <li> tags with an <ul> tag within it, you can add new links.
CSS Code
The CSS code used in this tutorial have very basic style. So a beginner in CSS can also customize it. Following is the code for container of navigation bar (<div id=”#nav”>):
line-height:32px;
background:#3B5998;
padding:0 10px;
}
#nav ul li {
padding:0;
list-style:none;
}
#nav ul li{
display:block;
}
And here is the code for navigation links. This code defines the sub items for each main items.
#nav ul li a:visited{
font-size:14px;
font-weight:bold;
text-decoration:none;
padding:0 20px 0 6px;
display:block;
}
#nav ul li a:hover{
}
#nav ul li ul li{
display:block;
}
#nav ul li ul li a:link,
#nav ul li ul li a:visited{
font-size:11px;
font-weight:bold;
text-decoration:none;
padding:0 10px;
clear:both;
border-bottom:solid 1px #DEDEDE;
}
#nav ul li ul li a:hover{
background:#EBEFF7;
}
Code for sub-menu segment:
width: 160px;
background: #FFF;
padding: 10px;
border: solid 1px #2E4B88;
border-top: none;
display: none;
line-height: 26px;
z-index: 1000;
}
jQuery Code
We have used jQuery code for showing and hiding sub-sections using mouseover and mouseleave jQuery events. You just have to copy the following code into the <head> tage of your page. And remember to have a link to jQuery using the following code:
You can also add this code in an external JavaScript file and then import it to a page. Following is the code:
function nav(){
});
$(‘div#nav ul li’).mouseleave(function() {
});
$(‘div#nav ul li ul’).mouseleave(function() {
});
};
$(document).ready(function() {
});
</script>
it would be nice if theirs a demo for this tutorial…