 For this post, we will teach you a Photoshop tutorial that will create a tough metal text effect. As well, you will learn to use various drawing techniques, channels, and patterns. So let’s get started to this Photoshop tutorial!
You may like to check out our previous Photoshop tutorials:
- Handy Techniques for Cutting out Hair in Photoshop
- Quick Way to Apply Your Photos a Retro Comic Book Effect
- How to Create a Simple and Elegant Text Effect
- Magical Lighting Effect in Photoshop
- How to Give a Cool Retro Analog Effect to Your Photos
Tough Metal Text Photoshop Tutorial
Step 1
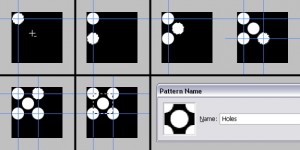
First define a pattern of dots. Let’s start by creating a new document 100 pixels wide and 100 pixels high, with a Resolution set to 300 pixels/inch. Fill the “Background” layer with black. Grab the Elliptical Marquee Tool, set the Style to a Fixed Size and set the Width and Height to 24 pixels. Click anyplace inside the canvas, then click inside the selection, drag and position it in the top-left corner of the canvas. Now, fill the selection with white. Drag one vertical and one horizontal guide to the center of the selection. Hold down the Shift key and press Down the Arrow key four times to move the selection down 40 pixels. Fill it with white. Now move the selection 20 pixels up and 20 pixels right, and then fill it with white again. Move the selection this time, 20 pixels down and 20 pixels right and fill with white.
Now drag two more guides to the center of the selection as in the image below. Now move the selection 40 pixels up and fill with white once again. Now grab the Rectangular Marquee Tool and select the area between the crossing guides as shown below. Now, go to Edit > Define Pattern and name the pattern “Holes.”
In this step, we have defined a pattern.
Step 2
Now create a new document 1450 pixels wide and 700 pixels high at a resolution of 300 pixels/inch in Photoshop. But make sure the Color Mode is set to RGB. Use the Horizontal Type Tool to type your text.

Step 3
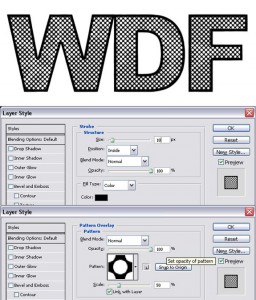
In this step we are going to apply two Layer Styles. First apply a Stroke using these settings: Size set to 10 pixels, Position set to Inside, Blend Mode of Normal, Opacity at 100% and color set to black. Then apply a Pattern Overlay and use the following settings: Blend Mode set to Normal, Opacity at 100%, Pattern set to “Holes,” and set scale to 50%.
Step 4
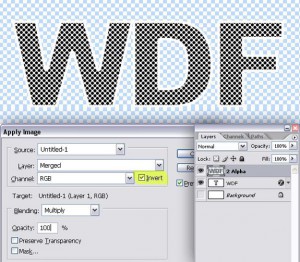
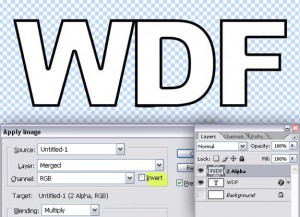
Now make the “Background” layer invisible and create a new layer on top and name it “2 Alpha.” Go to Image > Apply Image and check Invert. This will flatten the current visible layers in the selected layer and invert it.
Step 5
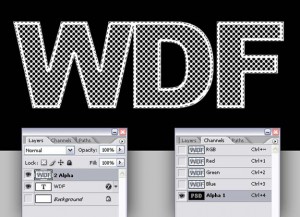
For now command-click the “2 Alpha” layer to load the selection and hit Command + C to copy. Go to the Channels Palette and create a new Channel. Hit Command + V to paste. Hit Command + D to deselect.
Step 6
Go to the Layers Palette. We don’t need “2 Alpha” layers anymore so delete it. You can turn off the visibility of the Pattern Overlay style of the “WDF” layer and set the Text Color to white. The layer is named “WDF” because I typed the text: “WDF”. Your text layer is named whatever you typed.
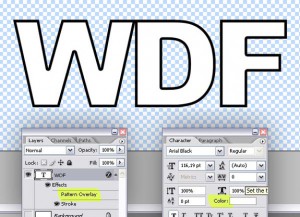
Step 7
Create a new layer on top and again name it “2 Alpha” because this one will be going to an alpha channel. Be sure that “Background” layer is still invisible. Go to Image > Apply Image and then uncheck Invert.
Step 8
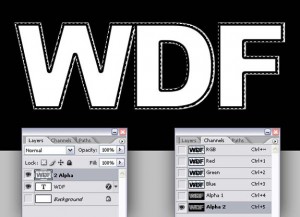
At this step command click the “2 Alpha” layer to load the selection and hit Command + C to copy, go to the Channels Palette and create a new channel, then hit Command + V to paste. While you’re in the Channels Palette, Command-click the “Alpha 1” channels to load the selection.
Step 9
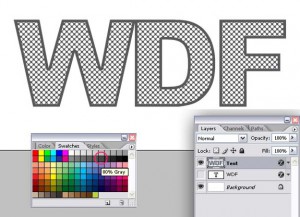
Go to the Layers Palette and create a new layer named “Text.” Set your Foreground Color to 80% gray by hitting Alt + Backspace, then Deselect.
Step 10
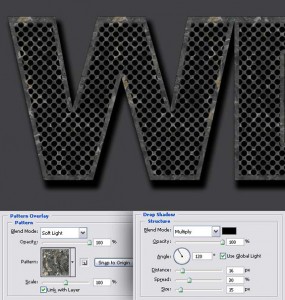
As we want background in our final image, it’s a good idea to make the background darker now. So fill the “Background” layer with 90% gray. Now we are going to apply two Layer Styles to the “Text” layer. The first one is a Pattern Overlay with these settings: Blend Mode set to Soft Light, Opacity at 100%, Pattern set to “Black Marble,” which is located in the “Rock Patterns” and Scale set at 100%. The second Layer Style is a Drop Shadow with these settings: Blend Mode set to Multiply, Opacity at 100%, Angle set to 120 degrees, Distance set to 16 pixels, Spread set at 30% and Size set to 15 pixels.
Step 11
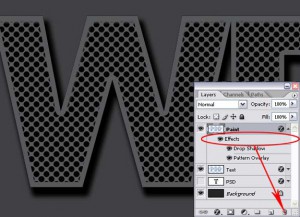
Now go to Layer > Duplicate Layer and name the duplicate “Paint.” Drag the Effects of this layer to the trash in the Layers Palette as shown below.
Step 12
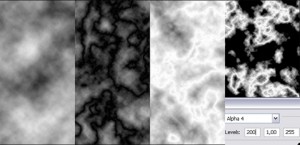
Go to Channels Palette and create a new channel. Go to Filter > Render > Clouds. Now go to Filter > Render > Difference Clouds. We’ll apply this filter twice more, so Press Command + F twice. Now go to Image > Adjustments > Invert. Go to Image > Adjustments > Levels (Command + L) and set the Input Levels to 200, 1, 255. The white area in this image is going to be the eroded parts of the paint. Command-Click the channel to load the selection.
Step 13
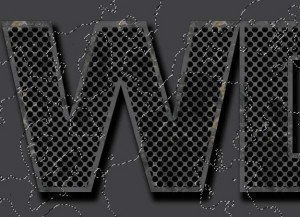
Now go to the “Paint” layer in the Layers Palette and hit Delete to clear the selected area. Go to Layer > Duplicate Layer and name it “Grain.” Make the “Grain” layer invisible for now, and then deselect it.
Step 14
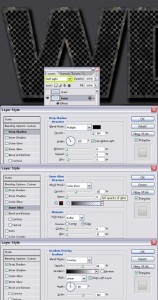
Go back to the “Paint” layer and apply a Drop Shadow Layer Style with these settings: Blend Mode set to Multiply, Opacity at 100%, Angle set to 120 degrees, Distance and Spread set to 0, and Size set to 5 pixels. Apply an Inner Glow and use these settings: Blend Mode of Color Burn, Opacity at 35%, and Size set to 1 pixel. Now apply a Gradient Overlay with these settings: Blend Mode set to Overlay, Opacity at 60%, Gradient set to Black and White, Style set to Linear and Angle set to 90 degrees. Don’t forget to set the “Paint” layer Blending Mode to Soft Light.
Step 15
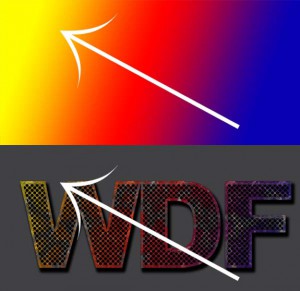
Now create a new layer above the “Paint” layer and name it “Color.” Use the Gradient Tool, open the Gradient picker in the Tool Options and pick: Blue, Red, and Yellow. Set it to Linear Gradient and fill the layer as shown below. Hold down the Alt key and click the line between the “Paint” and “Color” layers to define the “Paint” layer as a Clipping Mask. Set the “Color” layer Blending Mode to Difference.
Step 16
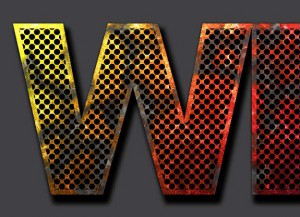
Click “Grain” layer in the Layers Palette and make it visible. Go to Filter > Artistic > Film Grain. Set the Grain to 10, Highlight Area and Intensity to 0, and set the Blending Mode for the layer to Color Dodge.
Step 17
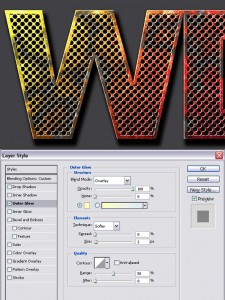
Command click the “Text” layer to load the selection. Now create a new layer on top and name it “Highlight.” Grab the Elliptical Marquee Tool and use the Arrow keys to move the selection 1 pixel left and 1 pixel up. Fill the selection with white. Move the selection 1 pixel right and 1 pixel down, back to where it was and hit Delete to clear. Apply an Outer Glow Layer Style to the “Highlight” layer using these settings: Blend Mode of Overlay, Opacity at 100%, and Size set to 2 pixels.
Step 18
Go to the Channels Palette and Command-click “Alpha 2” to load the selection. Go back to the Layers Palette and create a new layer on top. Name it “Highlight 2.” Move the selection 2 pixels right and 2 pixels down. Fill the selection with white. Now move the selection 2 pixels left and 2 pixels up and hit Delete to clear. Now deselect.
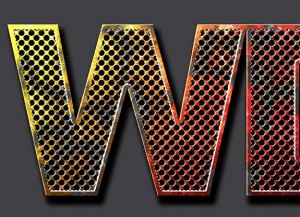
Step 19
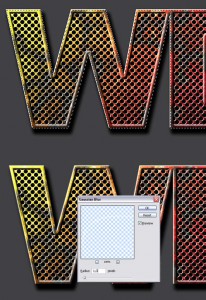
Go to Filter > Blur > Gaussian Blur and apply with a Radius of 1 pixel. This is going to smooth the highlight.
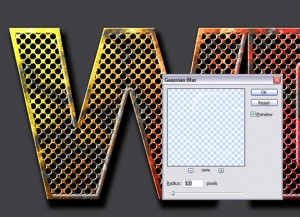
Step 20
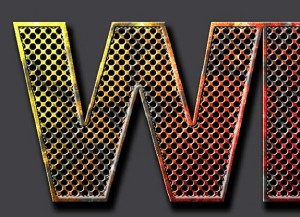
Click on Channels Palette and Command-click “Alpha 2” to load the selection again. Go back to the Layers Palette and create a new layer on top and name it “Shade.” Move the selection 2 pixels left and 2 pixels up. Fill the selection with black. Now move the selection 2 pixels right and 2 pixels down and hit Delete to clear.
Step 21
Deselect by hitting Command + D. Go to Filter > Blur > Gaussian Blur and apply with a Radius of 1 pixel.
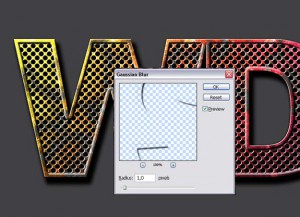
Step 22
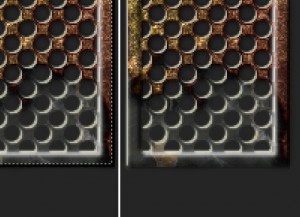
Command-click the “WDF” layer to load the selection. Create a new layer on top and name it “Shade 2.” Fill the layer with Black. Move the selection 2 pixels up and 2 pixels left, then hit Delete to clear. Command-click the “WDF” layer again. Go to Filter > Blur > Gaussian Blur and apply with a Radius of 2 pixels.
Step 23
Command-click the “WDF” layer again and load its pixels. Create a new layer on top and name it “Highlight 3.” Fill the selection with black. Move the selection 2 pixels down and 2 pixels right and hit delete to clear. Command-click the “WDF” layer and load the selection again, because we don’t want this highlight to be blurred towards the outside. Now go to Filter > Blur > Gaussian Blur and apply with a Radius of 1 pixel. Deselect by hitting Command + D.
Step 24
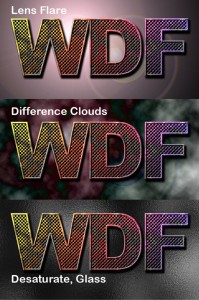
Now create a new layer above the “Background” layer and name it “Texture” and fill it with black. Go to Filter > Render > Lens Flare. Set the Brightness at 160% and set the Lens Type to 50-300 mm zoom. Then go to Filter > Render > Difference Clouds. Go to Image > Adjustments > Desaturate. Apply a Glass filter by going to Filter > Distort > Glass and use these settings: Distortion set to 20, Smoothness set to 2, and Scaling set at 100%. Finally, apply a Gradient Overlay Style to this layer and use these settings: Blend mode of Multiply and Opacity set at 70%.
You can get different variations of this effect by changing the gradient or color of the “Color” layer and changing the Texture of the Pattern Overlay Layer Style of the “Text” layer.
Final Step
And we have done! Below is the final result.

Download PSD file of this Photoshop tutorial – Create a Tough Metal Text with Photoshop

I would have never tried using Photoshop if this post wouldn’t have been shared by you. This post is a bookmark in my browser. Thanks a tons!
Wonderful